 So I really like biscuits. I am a fan of cookies too, don’t get me wrong, but I love biscuits.
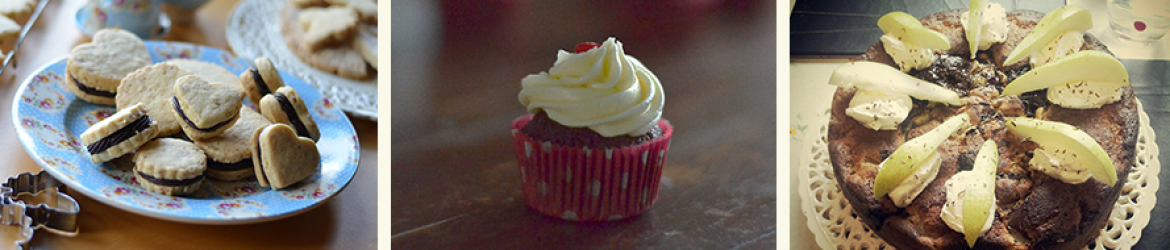
Jammie Dodgers are the type of biscuits I remember growing up. My plan is to bake my way through all the classics; Custard Creams, ToffeePops, Bourbon, Jaffa Cakes, they all await me! However, I started with a buttery, crumbly, fruity treat!
This is the type of biscuit that you can vary to your own taste, but has the added advantage of being made up of pretty everyday ingredients. My flavours were largely dictated by what was in the house, and the recipe was inspired by a great blog, Lavendar and Lovage.
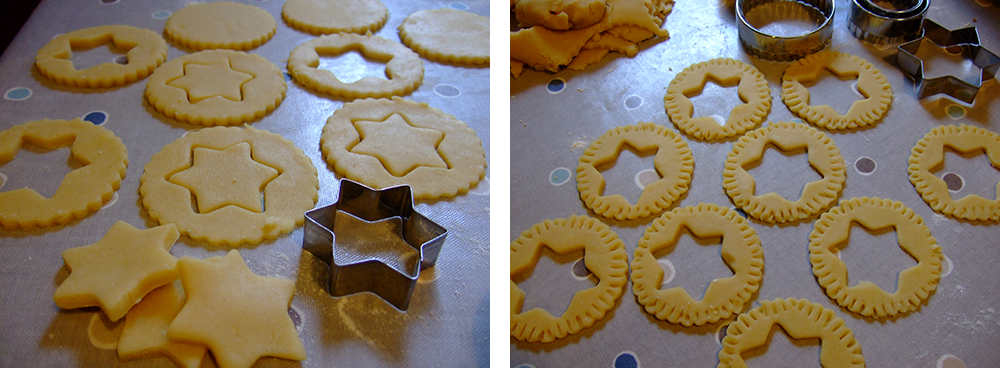
If you’re in a hurry then this probably won’t be the right recipe for you. All the steps are pretty straightforward, but benefit from a bit of time and attention. That’s what makes them enjoyable, fun and therapeutic to make. It would also be a lovely recipe to do with a friend of any age. I made them for a friend who had moved into a new house. I wanted to cut out little heart shapes but couldn’t find the right cutter. (That’s what comes of having more biscuit cutters than is necessary or sensible). However, I thought the star looked quite cute!
Circles are the traditional shape, so a glass and an eggcup or lid of a bottle will certainly do the job here. My star shaped windows are a little bit big but I liked seeing all that shiny fruity jam!
Almond and Raspberry Jammie Dodgers
Ingredients
227 grams unsalted butter, softened (basically a half pound)
150 grams sugar
1 egg yolk
½ teaspoon vanilla extract
1 teaspoon almond extract
300 grams plain flour
Pinch of salt
Raspberry jam (about half a jar)
Egg white and extra sugar to glaze
Method
- Cream the butter until very soft.
- Add in the sugar and mix well (This is called a creaming method).
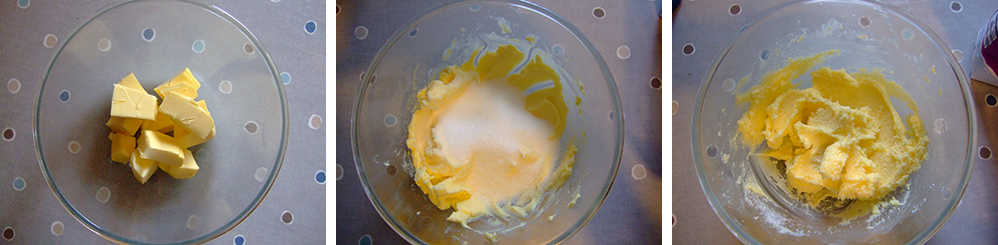
- Add the egg yolk , vanilla and almond extract and mix well.

- Add the flour and pinch of salt. Mix. It may seem dry with clumps of butter and flour. I normally tip it onto the table and use my hands to bring it all together. If you can’t get it to come together (this will be affected by the size of your egg yolk and the water content of your butter), add a little cold water at a time until it forms a dough.
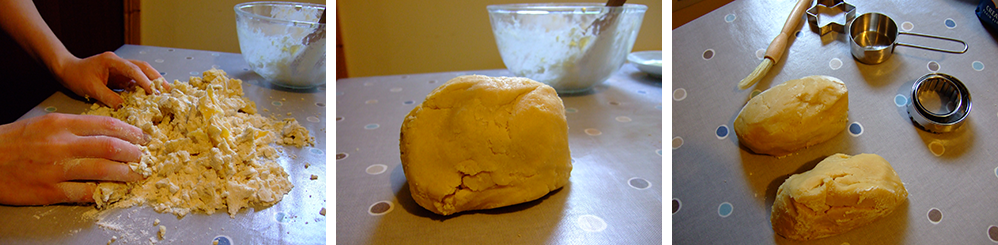
- Split the dough roughly in half, flatten into discs and pop into the fridge for twenty minutes (This makes it easier to roll and handle).
- Preheat the oven to 180 degrees Celcius.
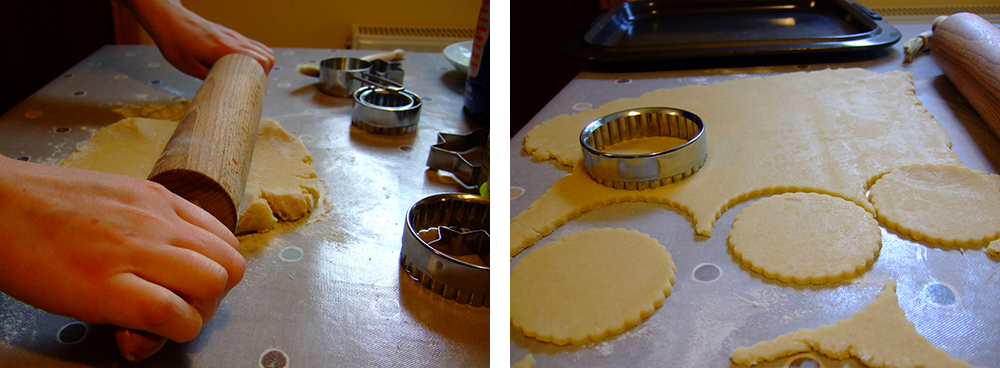
- Roll the dough out between two pieces of parchment or on a floured surface to between 2mm and 4mm. This is going to be sandwiched with another biscuit so you don’t want it to be too thick. The bits of scrap dough can be pulled together and re-rolled.
- Cut out whatever shapes you please. This dough hold it’s shape pretty well when baking but probably won’t work for very intricate shapes.
- Transfer onto a baking sheet. You can use baking parchment if you wish, as you can lift this off easily with the biscuits still on it after baking so that you can use the tray quickly for the next batch.
- It is important to try and maintain the shape of the dough as much as possible, so using a spatula or fish slice can help to get the dough onto the tray.
- These ‘full’ biscuits bake for 12- 18 minutes depending on size. They are done when they are a little golden around the outside.
- While they are baking, roll out the second half of the dough and cut out biscuits using the same cutter. Now use a cutter to cut out the centre of the biscuit in whatever shape you like.
- When you re-roll the scraps of this dough, you’ll have to count up your ‘full’ biscuits versus your ones with cut out shapes and try to get equal numbers of each. They all need a partner!
- These biscuits with the cut out middle require even more care not to lose their shape when transferred to a baking tray, so a cake slice or spatula is very handy here.
- I used a fork to create a trim around the outside. I also glazed them with egg white and sprinkled with white sugar for a crunchy top. This is optional.
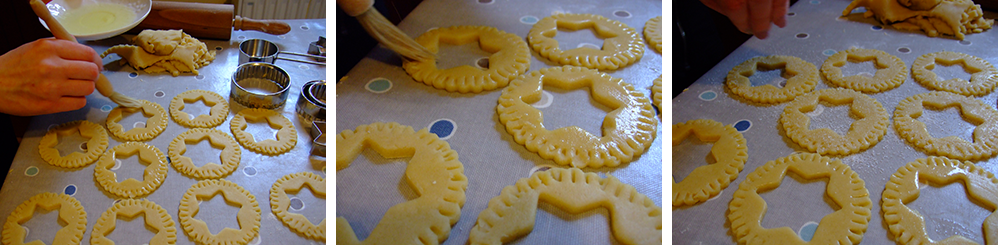
- These cut out biscuits will take less time to cook, depending on the size of the cut out. Mine took 8 minutes.
- It’s best to cook the ‘full’ biscuits and the cut out biscuits on separate trays as they cook at different speeds.
- Once the biscuits are baked, let them cool for a few minutes before very carefully (again a cake slice is very handy!) transferring them to a cooling rack to cool completely. They will be very delicate when warm.
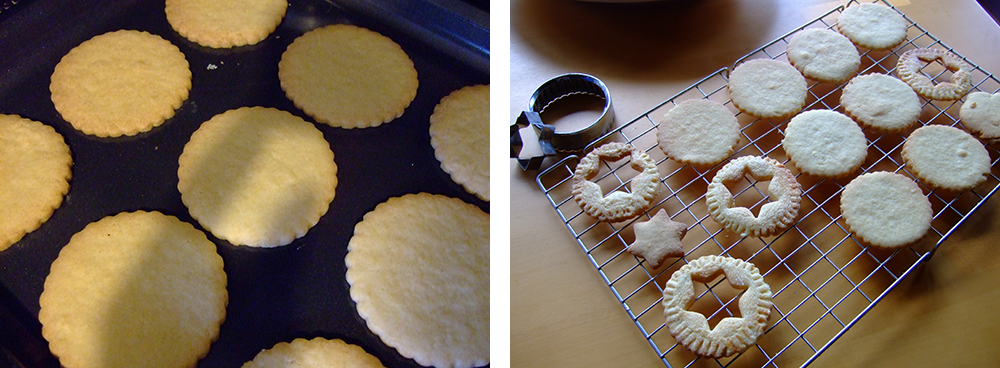
- Turn the base biscuit upside down and spread on a generous amount of jam.
- Put the cut out biscuit on top.


Enjoy!
Variation:
Any types of fillings (chocolate spread, jams, curds etc) could be used as well as varying the biscuit flavouring (Replacing 2 tablespoons of flour with cocoa, adding lemon, lime or orange zest or rose water) will really make these biscuits your own!

As always, a brilliantly entertaining post, with perfect detailed instructions, and a mouthwatering result! Thanks Bridget x
Thanks Oonagh! x
Hi from a new follower!! 🙂 These look delicious!! Deadly idea baking your way through the biscuit tin! I’m I also LOVE biscuits – they’re definitely my weakness so I think I’ll be trying out one or two of your recipes! 🙂
Yummmmyy.blogspot.ie
Thanks so much! I hope we can bake along together! I am torn between custard creams and toffee pops next! Such difficult baking dilemmas! Think we like similiar flavours – love your almond and raspberry cupcakes! B x
Mmmmmm you had me at toffee pops!
Great idea, well done – can’t wait to try these out
Pingback: Walnut and Hazelnut Biscotti/Cantuccini (lactose free) « The Search For Delicious
Pingback: Lemon and Sesame Seed Biscuits « The Search For Delicious