Dark and white chocolate straws are like cheese straws except with chocolate. What’s not to like? The base of these is an unsweetened cocoa pastry topped with a mixture of chopped chocolate. The sweetness really comes from the white chocolate, and the time in the oven caramelises the sugar in the white chocolate to give an almost burnt sweetness.
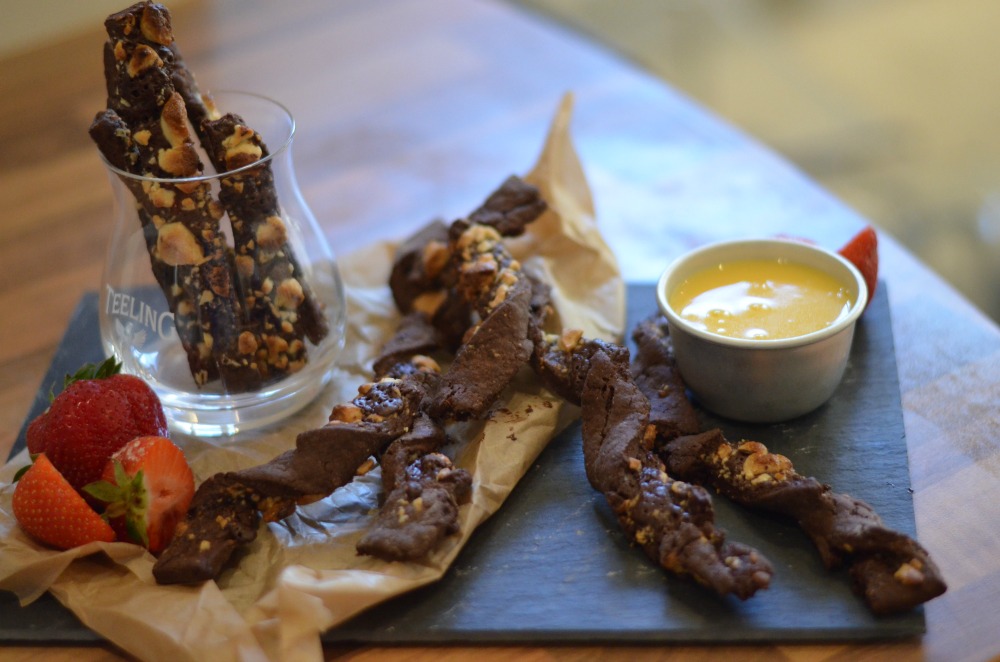
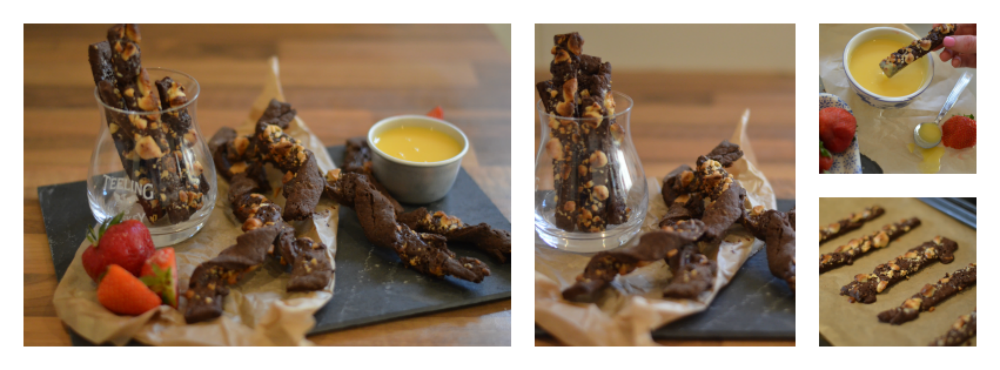
The base is pretty crumbly and flaky which is lovely with the chunks of chocolate, and I love how these look. All the different grades of brown to cream are so pretty and mean you taste chocolate before you’ve even picked them up! These would be great as a gift or as a party food, stacked up in a basket or standing in a glass or jar. It’s the type of sweet treat that’s made to pass around and share in a convivial setting.
I served these ones with strawberries and an orange whiskey curd…it was almost a reverse fondue type experience! I did twisted straws and flat ones. The flat ones are certainly easier and quicker to make, but I liked that the twisted ones protected the white chocolate to give nuggets of pure vanilla sweetness. If you’re an engineer or someone geometrically orientated, look away…these were done very roughly by hand so don’t enjoy the chic style of clean lines. You can, of course, get a ruler out but I like a ..ahem…rustic look.
As my dad would say, they all go down the same way. In this case, with some pleasure!
Ingredients
100 grams of plain white flour
26 grams of cocoa
Pinch of salt
1 egg beaten
50 grams of unsalted butter, cold and cut into cubes.
Topping
A tablespoon of soft butter
60 grams of white chocolate
40 grams of dark chocolate
Method
Sieve or whisk together the flour, cocoa and salt.
Add the cold cubed butter and rub in into the mix. This means breaking down the butter between your forefinger and thumb to incorporate it into the mix. It should look like dry breadcrumbs when you’re done.
You can of course just whiz it up in the food processor, but whichever you do, don’t do it for too long.
Add the beaten egg and mix to form a ball. It might need a couple of spoonfuls of cold water, but the cocoa is very drying so it will probably be a slightly crumbly ball.
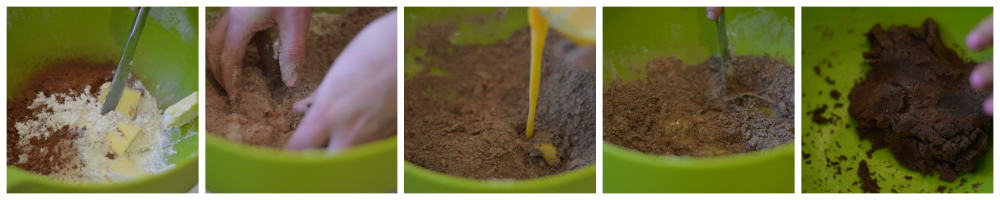
Wrap in cling film and pop it into the fridge to chill for about fifteen minutes.
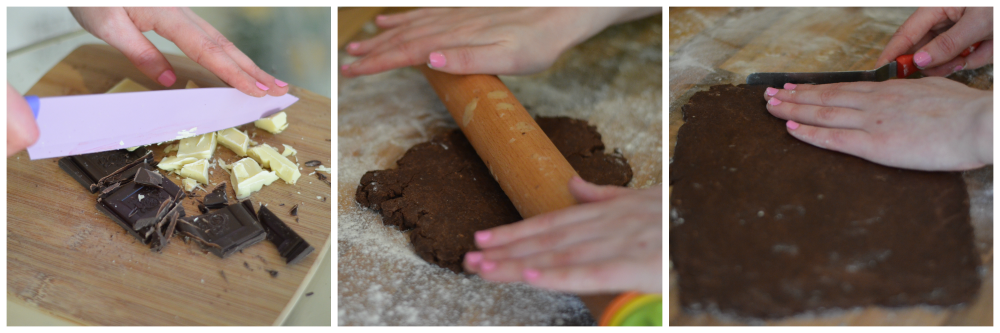
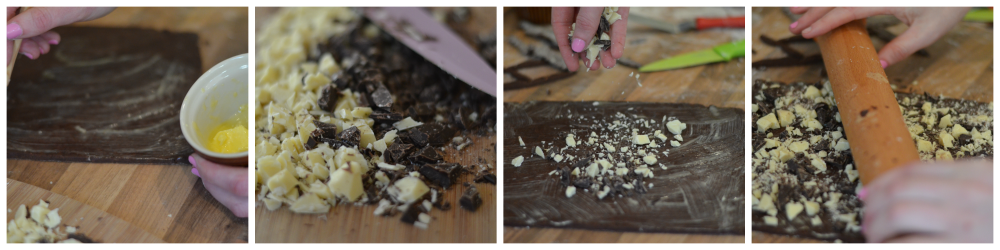
Chop up the chocolate. I like a variety of sizes, but nothing too big.
Preheat the oven to 170 degrees celcius. Line some baking trays with parchment, or grease them well.
Retrieve your dough from the fridge. Flour a surface lightly and dust flour on the dough. Roll out the dough into a rough rectangle. It should be about ¼ to a ½ an inch thick. Keep it moving so it doesn’t stick! I use a knife to level off the edges a bit by pushing it into shape.
Smear the soft butter all over the rectangle with a brush or your fingers.
Sprinkle on the chocolate as evenly as you can and use a rolling pin to push it gently into the dough.
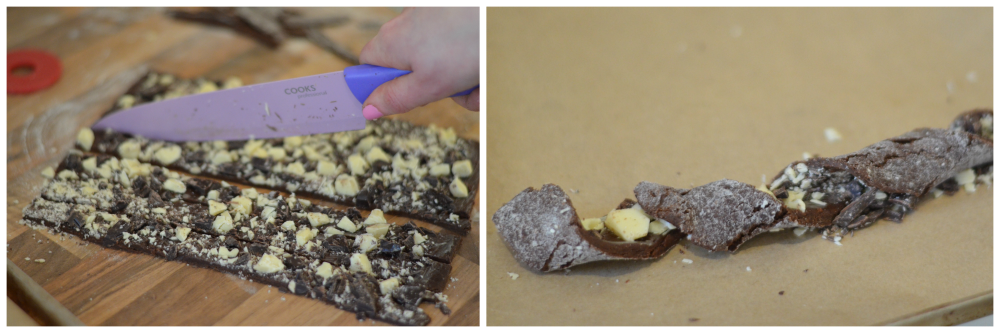
Now, use a knife to slice the dough into ‘straws’. I sliced length ways to get longer strips.
Some I cut in half to bake as flat straws. Others I left longer and gently twisted after I put them on the baking tray. They’re hard to move after you twist them!
I baked them for about 11 minutes, but this will depend on the size of your straws!
Hi Bridge, this is probably in the article, but… How long do these last? If I wanted to make them for an event (say Christmas!) when should I go to work??
Thanks in advance.
Susan.
Hi Susan. These keep well for a couple of days in an airtight container. If they seem a bit soft you can crisp them up in a warm oven for two minutes. Plus, that’ll melt the chocolate again! Bridget x